I Want Chocolate!

Chocolate brownie

I realized over the weekend that my first blogiversary came and went with no fanfare, public or private.  Indeed, it has been over a year since I started detailing my eating habits online, posing my food for pictures, and attempting to cook my way through an entire cookbook library.  It has been a wonderful experience thus far, and it is sad to me that only a year into the project my posting frequency has fallen off so dramatically.  I can keep explaining to everyone that grad school is frickin’ HARD, but that’s boring and obvious.  With the holidays coming up, cooking and eating will no doubt become a priority again, and you will see it all here!  Until then — we must celebrate with chocolate.

This amazing recipe comes from a cookbook I picked up in Les Galleries Lafayette in Paris.  Whether my French language skills were advanced or pitifully wanting at the time, I could understand the cover photo of a pan of brownies with multiple spoons digging in, and the simple exclamation that makes up its title: Je veux du chocolat! (I Want Chocolate!) with little effort.  So when I figured out that my blog’s one year anniversary had been achieved, I decided that I, too, wanted chocolate.  Though the book contains myriad iterations of chocolate confections – mousse, cake, cookies, ice cream, etc. – this one has always been a favorite of both mine and my mother-in-law’s.  It is quite simple to pull together, and is surprising in its rich cocoa flavor and dense, moist center.

All I ask is that once you unmold the perfection that is this dessert, and grab your fork and vanilla ice cream, you dedicate your first bite to the perpetuation of FromMyTable.com.  A votre sante!

Gateau au Chocolat Fondant de Nathalie (Nathalie’s Melting Chocolate Cake), from Je Veux du Chocolat
(serves 8 at least!)

Please excuse the irregular measurements — I am translating from the French here!
7 oz. (200 grams) bittersweet chocolate (I used 70% cocoa)
1 stick plus 6 Tbs. (200 grams) butter
5 eggs
1 Tbs. flour
1 1/4 cup + 1 Tbs. (250 grams) sugar

Heat the oven to 375 degrees (190 C.) and grease an 8- or 9-inch diameter springform pan or tart pan with removable base.

Melt the butter and chocolate together in a microwave or double boiler. Add the sugar and set aside to cool slightly.

One by one, add the eggs, stirring well with a wooden spoon after each egg. Finally, add the flour and stir until smooth.

Pour mixture into the prepared baking pan and cook for 22 minutes. The cake should be still lightly trembling in the middle. Take out of the oven, unmold quickly, and let cake cool and rest on a rack until ready to serve. Bon Appetit!!

Profiteroles

Profiteroles

You will know that school is going well and that I have retained my sanity when posts appear here on From My Table.  As you can tell, it was touch and go there for a while, since my last post was put up here almost a month ago.  But today I finished writing my first paper (and it was a doozy!) and I finally have time to catch up here.  To set your minds at ease, it isn’t that I haven’t been eating or cooking.  I have just found that I can either post on the blog or cook and photograph, but not both.  I have stored up quite a few meals in my camera, but my typing time (and sterling wit) has been expended elsewhere for the past month — namely, at school.

Here’s the good news: I have a killer dessert for you.  Made of chou dough (the same used for gougères), these are simple and scrumptious and versatile to boot.  The ingredients are probably in your fridge and on your counter right now, and they take a mere half hour to make.  Plus (as if you needed further incentive), profiteroles cut an elegant figure and thus can be served at your next dinner party.  If you can wait that long…

Profiteroles, from the Moosewood Restaurant Book of Desserts

(Serves 6-8)

1 cup water
5 Tbs. butter
1 c. unbleached white flour
1/4 tsp. salt
2 tsp. sugar
4 large eggs

Preheat oven to 400 degrees F. In a saucepan, bring water and butter to a boil. Meanwhile, in a separate bowl, combine flour, salt, and sugar. When water and butter boil, add the dry ingredients at once, stirring vigorously with a wooden spoon. Continue stirring until the mixture forms a ball and pulls away from the sides of the pan, like so:

profiterole-dough-ball-stage

Remove from the heat and allow to cool for 2-3 minutes. Then, beat the eggs in, one at a time. Each egg will make the mixture gloppy and slimy for a minute, but will turn back into smooth dough after some sustained stirring.

Profit-dough-gloppy

profit-smooth-dough

Lightly oil a baking sheet and/or line sheet with parchment paper. Using the wooden spoon or, if you’re fancy, a pastry bag, form mounds of dough 2 inches apart on the baking sheet. Use about 1/4 cup of dough for each large puff or about 2 1/2 Tbs. for smaller puffs. Bake for 10 minutes at 400 degrees then reduce temperature to 350 (don’t open the oven!) and bake for 20 minutes more for smaller puffs or 25 minutes more for larger puffs.

profit-dough-balls

When the puffs are firm, turn off the oven, remove the puffs, and using a small sharp knife, score a horizontal cut about 2/3 of the way up each puff (this is much easier right out of the oven when the puffs are crispy). Return the puffs to the still-warm oven for about 15 minutes to let the residual heat dry them a bit. Remove and cool completely.

Profiterole

When ready to serve, fill as desired by cutting the top from each puff at its scored mark, mounding the filling inside and replacing the top.

Profiterole-Caramel

My favorite fillings include:
Brigham’s vanilla ice cream with Herrell’s hot fudge sauce and/or dulce de leche (I used Stonewall Kitchen)
Home-made ice cream (coconut? strawberry? mocha chip?)
Apple chunks sauteed in butter, sugar, and cinnamon.
Cannoli filling (sweet ricotta, mmmm…)

Summer Lovin’ Crostata

crostataBefore I ever started writing a food blog, I was reading food blogs.  Many, many of them.  My favorites are listed on the right-hand side of this page — those are the ones I wholeheartedly endorse.  I do so because I can count on each of them, albeit for different things.  When I need to know what to cook for RJ (and am unconcerned about calorie intake), I visit the Pioneer Woman.  When I am feeling healthy and adventurous, I’ll often check in with Molly.  And when I’m in the mood to dream of Paris, I click into Clothilde’s site.  Other blogs I read daily, because they post frequently and because they provide not only recipes but also reviews, interesting links, and unique perspectives.  One of these is Adam’s Amateur Gourmet site.
Adam is a reliable and lovable source, especially because he is so straightforward about his ‘amateur’ status.  His pictures aren’t pristine like Deb’s, and he doesn’t have pastry chef credentials like David.  But he’s witty (see his comic strip posts) and unpretentious (he did a post about the books in the Momofuku Ko bathroom) and he makes a mean pork roast.  What else could you want in a daily pick-me-up read?

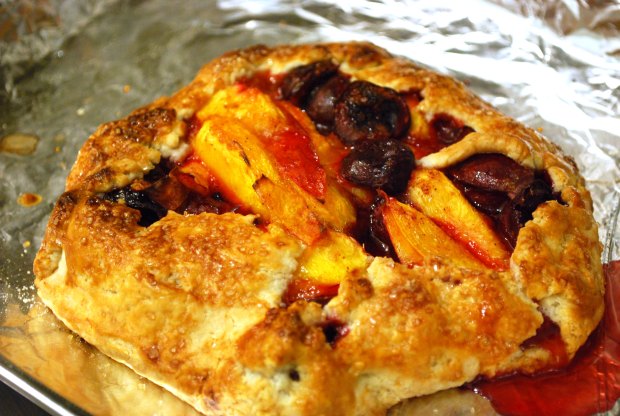
Anyway, I mention Adam because he hasn’t steered me wrong yet (though I’ll admit I haven’t gone up every alley he recommends: Janet Jackson Breast Cupcakes, anyone?).  His roasted broccoli (via Ina Garten) is a life-changer, and he has given me many a fine cookbook recommendation, thus feeding my addiction.  So when he suggested, nay, ordered me to go Crostata Crazy, I did.  I cut up some nectarines and pitted some cherries and while I intended to cheat on the pie crust and use Pillsbury, circumstances (read: Whole Foods is not actually a supermarket) forced me to make my own and I’m glad I did.  All the work was done by my Cuisinart — all I had to do was measure 4 or 5 pantry ingredients, pulse, then roll out the dough after a half hour in the fridge.  The results?  Impressive, to say the least, and bursting with summer flavors.  A quarter of the recipe below makes a crostata for two.  Make the whole batch to have pie dough on hand for the next time and a dessert for six on the table in an hour.

crostata with summer cherriesCherry and Nectarine Crostata, adapted from Napa Style’s Michael Chiarello via Amateur Gourmet

(Serves 6)

Tart Dough:
2 1/2 cups unbleached all-purpose flour
2 tablespoons granulated sugar
2 teaspoons salt
1 cup (1/2 pound) chilled unsalted butter, cut into tablespoon-size pieces
1/4 cup ice water, or more if needed
1 teaspoon pure vanilla extract

Filling:
4 cups of fruit of your favorite combination: pitted fresh cherries, sliced nectarines, berries, apples, diced rhubarb, etc.
1/4 cup granulated sugar (adjust to your taste and the type of fruits used)
1 tablespoon unbleached all-purpose flour
1/4 teaspoon ground cinnamon
1/4 teaspoon salt

1 egg yolk beaten for egg wash
2 teaspoons coarse sugar (like Sugar in the Raw)
Directions
Make the tart dough: Combine the flour, sugar, and salt in a food processor and pulse to blend. Add the butter and pulse until the mixture forms coarse crumbs. Stir together the 1/4 cup ice water and the vanilla; sprinkle the water over the mixture in the processor and pulse just until a dough forms, adding a little extra ice water if necessary. Divide the dough in half, and shape each half into a 1-inch-thick round. Wrap 1 disk tightly in plastic wrap and refrigerate for at least 1 hour; freeze the other for a future use.

Put a pizza stone in the oven and preheat the oven to 425ºF for 45 minutes. Remove the dough from the refrigerator about 15 minutes before rolling to soften it slightly.

Place the dough round between 2 sheets of parchment paper and roll into a 13-inch round, flouring the round lightly as needed to keep the dough from sticking. Remove the top sheet of parchment. Slide a pizza peel or rimless baking sheet under the bottom sheet of parchment.

Make the filling: Combine the fruit, sugar, flour, cinnamon, and salt in a bowl and toss well. Fill the center of the dough round with the fruit in an even layer, leaving a border of about 1 1/2 inches. Fold the border up and over the fruit to make a rim. Brush the rim with egg wash, then sprinkle with coarse sugar. Trim the excess parchment with scissors.

Use the pizza peel or baking sheet to transfer the crostata, still with parchment underneath, to the oven, sliding it, with the paper, directly onto the pizza stone. Bake until the crust is nicely browned and the cherries are bubbling, about 40 minutes. Remove from the oven with the peel or baking sheet and let cool on a rack for 15 minutes before serving. Serve warm.

Ways to Use Up Buttermilk

panna cotta final

This week is, by necessity, leftovers week.  RJ and I are moving (!) and are packing up house, home, and pantry.  Even if you aren’t moving, it isn’t a bad idea to do a similar fridge-clearing exercise every once and a while.  The first step in the process is to take stock (as in inventory, not soup base) of what you need to use up.  Our list contained a random assortment of freezer-bound meats (2 sausages, 5 skinless chicken breast halves, a balsamic-marinated flank steak, 1 duck breast, etc. etc.), the standard hodgepodge of hopeful fruits and vegetables (some fennel, a bunch of rhubarb, a pint of strawberries, half a red onion, a cut-into lime, 1 head of romaine, a bag of green beans), various condiments, and buttermilk.  I groaned at that one.

Leftover from my Tiramisu Cake, the buttermilk sat untouched with the little toddler mascot staring at me everytime I opened the refrigerator door.  I never know what to do with buttermilk, and every recipe I’ve made thus far that has required me to purchase it uses a 1/2 cup or so, leaving the better part of a quart behind to waste away (and rancid buttermilk is not a pleasant smell, trust me).

That leads me to my second step in the cleaning-out process — evaluate the inventory’s perishability and strategize approach accordingly.  Obviously the two frozen sausages and the variable shapes of dried pasta you have on hand can wait a bit, whereas the strawberries, romaine, and buttermilk will need to be used immediately.  If you can think of recipes that use more than one of your on-hand ingredients at the same time, all the better!  I grabbed the rhubarb, the strawberries, and the buttermilk and set to work.

To really make a dent in the buttermilk container, I had to truly feature it in whatever I made.  So I chose Buttermilk Panna Cotta.  A quintessential summer dessert, panna cotta is cool and creamy with a consistency that falls somewhere between custard and jello.  You can top it with fresh berries, mango puree, wine syrup, chocolate, or even bacon!  Though out of season, pomegranate seeds might be nice too… kind of like my cheesecake topping from this past winter.  Endlessly modifiable, panna cotta is a delicious and versatile way of using up buttermilk!

buttermilkButtermilk Panna Cotta, adapted slightly from MarthaStewart.com
(Serves 6)
2 cups nonfat buttermilk
1 1/2 teaspoons powdered unflavored gelatin
2/3 cup heavy cream
1/2 cup sugar

3 stalks rhubarb
1/4 cup sugar
1 pint strawberries, hulled and quartered
1 Tbs. lemon juice

In the top of a double boiler (not over heat), sprinkle gelatin over 1 cup buttermilk; let stand to soften, about 5 minutes.

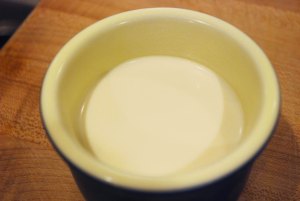
panna cotta in ramekinMeanwhile, bring cream and scant 1/2 cup sugar to a boil. Add to gelatin mixture. Place over simmering water; whisk until gelatin dissolves, 5 minutes. Stir in remaining cup buttermilk. Pass mixture through a cheesecloth-lined strainer. Divide among 6 four-ounce ramekins or small bowls on a baking sheet. Cover; refrigerate until set, 4 hours.

Meanwhile, place rhubarb in a small to medium sized saucepan with 2 tablespoons of water and 1/4 cup of sugar.  Stir to combine and place over medium heat.  When the mixture begins to boil, cover the pot and cook over low heat until the rhubarb is soft and begins to dissolve slightly, approximately 15 minutes.  Stir in strawberries and lemon juice, then taste to see if you need more sugar.

panna-cottaUnmold by dipping ramekins briefly into hot water and running tip of a knife around edges; invert onto plates, and serve with strawberries and their juice.

That definitely used up a bunch, but I still had over a cup of buttermilk sitting in the fridge.  I decided, then, on Sunday morning to finish up the strawberry-rhubarb topping and the buttermilk in one fell swoop.  I made waffles!  Good belgian waffles are such a treat on a lazy morning – especially with fresh fruit and whipped cream.

Buttermilk Waffles, from Cook’s Illustrated The New Best Recipe

(Makes 3-4 waffles, depending on size of waffle maker)

1 cup (5 oz.) unbleached all-purpose flour
1 Tbs. cornmeal (optional – lends a nice crunch to the waffles)
1/2 tsp. salt
1/4 tsp. baking soda
1 large egg, separated
7/8 c. buttermilk
2 Tbs. unsalted butter, melted and cooled

Heat a waffle iron. Whisk the dry ingredients together in a medium bowl. Whisk the egg yolk with the buttermilk and melted butter.

Beat the egg white until it just holds a 2-inch peak.

Add the liquid ingredients to the dry ingredients in a thin, steady stream while mixing gently with a rubber spatula. (Do not add liquid faster than you can incorporate it into the batter). Toward the end of mixing, use a folding motion to incorporate the ingredients. Gently fold the egg white into the batter.

Spread an appropriate amount of batter onto the waffle iron. Following the manufacturer’s instructions, cook the waffle until golden brown, 2 to 5 minutes. Serve immediately. (In a pinch, you can keep waffles warm on a wire rack in a 200-degree oven for up to 5 minutes).

Make toaster waffles out of leftover batter – undercook the waffles a bit, cool them on a wire rack, wrap them in plastic wrap, and freeze.

Buttermilk Waffle
Here are some other recipes using buttermilk – I wish you the best of luck getting rid of it in the most delicious of ways!