Spaghetti and Meatballs

Spaghetti and Meatballs

Some recipes, like croissants, are expected to be difficult and involved.  Recipes like those take actual scheduling to tackle – as in, when will I have three straight days in the same kitchen without interruption?  Other recipes such as, um, spaghetti and meatballs, seem so simple as to be almost an afterthought.  In fact, even though I knew that I needed to post this recipe today along with the other Barefoot Bloggers, I figured it would only take a half hour or so to make and photograph, so it was only last night that I began it.  

While spaghetti and meatballs is one of those American classics, it was never something my mother made.  If she had, maybe I would know that this dish takes FOREVER… At least the way Ina makes it.  The meatball combining and forming is not time-consuming, but frying said meatballs (in batches, no less) takes a long while…  Those puppies cook slow over medium-low heat.  Then you make the sauce and cook the meatballs in the sauce for a half hour.  The only thing you can do simultaneously – since Ina insists you use the meatball-browning pan for the sauce – is boil the pasta.

All that being said, the meatballs tasted great.  They had a light texture and a subtle but interesting flavor, led by the addition of nutmeg.  RJ immediately said “Great Meatballs!” – not eloquent or revelatory necessarily, but still sincere and based in experiential expertise.  Not sure I’d take the hour+ on another weeknight to make this dish, however.  

 Spaghetti and Meatballs, from Barefoot Contessa Family Style

(Serves 6)

For the meatballs:
1/2 lb. ground vealSpaghetti and Meatballs - Ingredients
1/2 lb. ground pork
1 lb. ground beef
1 c. fresh white bread crumbs (4 slices, crusts removed)
1/4 c. seasoned dry bread crumbs
2 Tbs. chopped fresh flat-leaf parsley
1/2 c. freshly grated Parmesan cheese
2 tsp. kosher salt
1/2 tsp. freshly ground black pepper
1/4 tsp. ground nutmeg
1 extra-large egg, beaten
Vegetable oil
Olive oil

For the sauce:Spaghetti Sauce
1 Tbs. good olive oil
1 c. chopped yellow onion (1 onion)
1 1/2 tsp. minced garlic
1/2 c. good red wine, such as Chianti
1 (28-ounce) c. crushed tomatoes, or plum tomatoes in puree, chopped
1 Tbs. chopped fresh flat-leaf parsley
1 1/2 tsp. kosher salt
1/2 tsp. freshly ground black pepper
1 1/2 lbs. spaghetti, cooked according to package directions
Freshly grated Parmesan
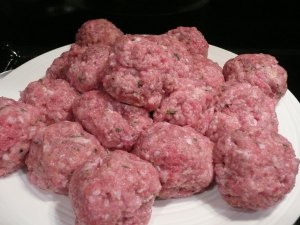
MeatballsPlace the ground meats, both bread crumbs, parsley, Parmesan, salt, pepper, nutmeg, egg, and 3/4 cup warm water in a bowl. Combine very lightly with a fork. Using your hands, lightly form the mixture into 2-inch meatballs. You will have 14 to 16 meatballs.

Pour equal amounts of vegetable oil and olive oil into a large (12-inch) skillet to a depth of 1/4-inch. Heat the oil. Very carefully, in batches, place the meatballs in the oil and brown them well on all sides over medium-low heat, turning carefully with a spatula or a fork. This should take about 10 minutes for each batch. Don’t crowd the meatballs. Remove the meatballs to a plate covered with paper towels. Discard the oil but don’t clean the pan.

Spaghetti Meatballs

For the sauce, heat the olive oil in the same pan. Add the onion and saute over medium heat until translucent, 5 to 10 minutes. Add the garlic and cook for 1 more minute. Add the wine and cook on high heat, scraping up all the brown bits in the pan, until almost all the liquid evaporates, about 3 minutes. Stir in the tomatoes, parsley, salt, and pepper.

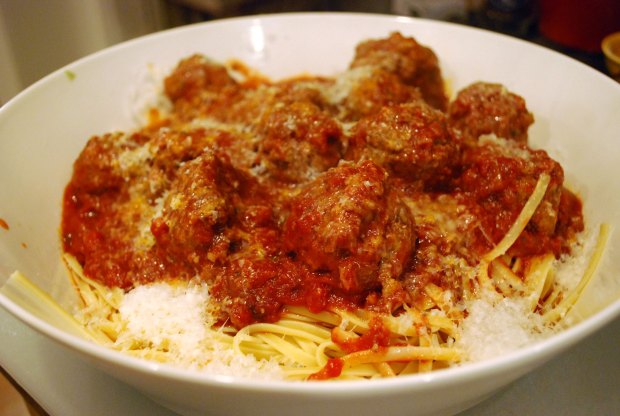
Return the meatballs to the sauce, cover, and simmer on the lowest heat for 25 to 30 minutes, until the meatballs are cooked through. Serve hot on cooked spaghetti and pass the grated Parmesan.

My Cheese Plate and a Short Dissertation on the Subject

Cheeses in France

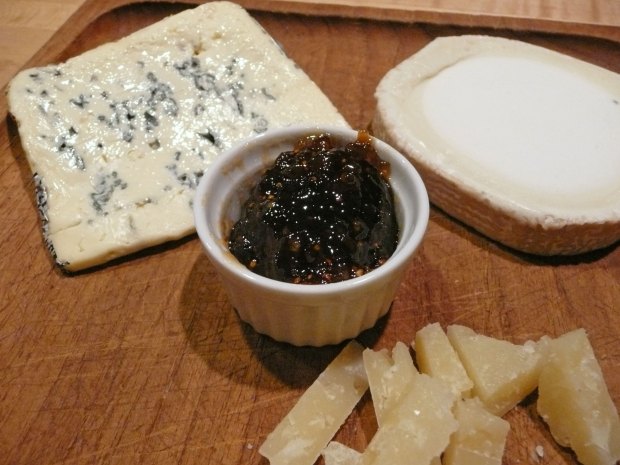
This month’s Barefoot Bloggers bonus recipe was more of a fun free-for-all.  Suggested by Rebecca of Ezra Pound Cake, participating bloggers each put together a cheese plate for mass digital/visual consumption.  I kept mine very simple, and only included 3 time-tested and well-proven crowd pleasers on the plate — St. Agur (a blue cow’s milk cheese from France), Boucheron (a wonderful goat cheese from France), and Pecorino (a sheep’s milk cheese from Italy that comes in many delectable variations – my favorite is Pecorino Nero):

cheese plate

I thought I would include in this post not only some of my favorite cheeses, but also some standard rules for cheese plate construction that I have picked up from books, restauranteurs, and the occasional honest-to-goodness French person!  And they know what they are talking about.  All of them.  Actually, I spent a year working in a cheese store before I began full-time at an art gallery.  And this is what I learned:

1. It is fun to have a theme to your cheese plate, especially if it is served as an hors d’oeuvres course.  The theme can be as general as “Cheese from France” or as acute as “Manchego” (featuring the cheese at different stages of aging).  Obviously the theme you choose should take into account the type of people you have invited – the uninitiated guest may not appreciate the subtle differences in flavor between Loire valley goat cheese and Corsican goat cheese, but the aficionado may enjoy the challenge – and the type of gathering you are hosting – if you are serving a huge multi-course meal, don’t go too crazy or elaborate with the pre-dinner cheese, but having friends for cocktails can be the perfect time to feature the cheeses you love.

cheese-on-bread with fig jam2. When serving cheese as a course during dinner, it is best to limit yourself to one to three cheeses, as more can overwhelm the palate.  In this setting, it is particularly nice to offer a variety – different milks (cow, sheep, and goat), different textures (soft, semi-hard, hard), maybe one blue cheese – and possibly a selection of accompaniments (baguette and walnut bread or crackers; a fig jam or chutney; some honey and walnuts; or a side plate with olives, cured meats, and fresh fruit).  
3. Always serve cheeses at room temperature for optimal flavor.  I usually take my cheese out of the refrigerator 45 minutes to an hour before serving, and leave it in its wrapper until guests arrive.

4. When tasting multiple types of cheese, start with the most mild-flavored (usually the younger cheeses), and move up the scale to the stinkiest or sharpest (blues, washed rind cheeses, etc.) so that you don’t lose your discerning palate before you even begin!  For this reason, it is always a good idea to know a little bit about the cheeses you’re serving before the party – ask your cheesemonger for a taste, or at least his/her opinion.

5. As a very general rule, when pairing wines with cheese, it is always a good bet to pick a wine from the same region as the cheese – Epoisses with a red Burgundy, Chaource with a Champagne, a chevre with a Sancerre.  Some fun exceptions are the blue cheeses which almost always LOVE a sweeter wine, such as ruby Port or a Sauternes.

So, those are some basic guidelines.  The most important one, however, is: 

6. KEEP EXPERIMENTING!  There are so many wonderful cheeses out in the world, and U.S. farms are now producing some absolutely fantastic examples.  Here are a couple of my favorite cheeses:

cheese-zoomSt. Agur: pictured on my cheese plate, this is a cow’s milk double-cream blue from the Auvergne region of France.  It is less salty and less piquant than other blues, and has a fabulously creamy texture.  I sometimes drizzle a little honey over a spread of this for a great contrast of flavors.  If it weren’t so gosh darned expensive (about $23/lb.), I’d brush my teeth with it. 🙂

RobiolaRochetta:  These mixed-milk cheeses are über-creamy (read: runny) and rich, with a flavor that gathers in strength as it ages.  I could eat these both (but especially the rochetta) in their entirety with just a baguette and a glass of Bordeaux to wash it down.   In fact, please note my last supper request!

Beaufort: This was one of the first cheeses that I truly appreciated.  I was introduced to it in Paris by a French woman who insisted that her daily cheese consumption was the reason for her physical fitness.  Quite a philosophy!  Beaufort tastes similar to gruyere, but has a fruity overtone and a more complex, layered flavor delivered in a subtle progression.

Abbaye de Belloc: This is the most gentle of the cheeses listed here – semi-firm in texture with a creamy, mouth-coating finish and an understated flavor profile.  It is pleasing to nearly every palate and, personally, transports me back to the side of a mountain in the Pyrenees.  That is one of the wonderful things about food – not only does it taste good, it has the ability to conjure up lovely memories.

Humboldt Fog:  When I worked at the cheese shop, this was one of my weaknesses.  From the outside, it looks like a brie – it has a bloomy rind and tends to soften (liquefy, really) from the outside in.  Through the middle of the cheese is a line of vegetable ash, similar to what you would see in a Morbier.  The goat cheese from this west coast producer is almost fluffy in texture, and embodies all that is wonderful in the taste of a good chevre, with a distinctive American look and feel.

Taleggio:  I had to wrap up with the stinkiest of my list.  This northern Italian cheese has a washed rind, meaning that during the affinage period it is ‘washed’ with a rinse of sea water (some cheeses are washed with wine or brandy too) – this promotes molds that prefer the moist surface, and aids the maturing process.  While I have a taste for VERY stinky cheeses too (like Epoisses which is washed with a strong local brandy), taleggio is nice in that the rind has a strong, complex aroma while the interior is more mild and oozy – not nearly as threatening as it seems.

Well, that list of favorite cheeses was longer than I thought!  Thanks for reading, and please leave your comments as to your favorite cheeses – I’m always looking for new ones to try!  If you can’t get enough cheese, check out the other Barefoot Bloggers’ boards.

Another day in Paris: Coq au Vin

coq-final

This week on Barefoot Bloggers, the featured recipe was Coq au Vin, or chicken cooked in wine sauce.  I think it was on “The Next Food Network Star” or some other such show where I first learned that Coq au Vin is traditionally made with a very old rooster.  That being unavailable, and rather unappetizing I might add…, I went with a split chicken breast.

The results here were excellent.   The sauce tasted rich and herbal; the chicken was tender and juicy.  RJ even ate the carrots, the broth was so good!  I don’t know how much I can credit the fact that I followed the recipe through the oven cooking portion the day before, then finished the sauce the next night, but the flavors were certainly pronounced and well blended.  This method also prevented us from eating dinner at 9:00 – always a plus.

I would certainly cook this again, though next time I will leave some time to reduce the liquids down a bit more.  My sauce was thin and did not really stick to the noodles or the chicken, even after the addition of the buerre manie.  Bon Appetit!

Coq Au Vin, from Barefoot Contessa Back to Basics

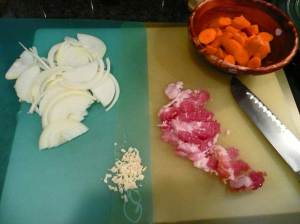
2 Tbs. vegetable oilcoq-mise
4 oz. good bacon or pancetta, diced
1 (3 to 4 lb.) chicken, cut in 8ths
Kosher salt and freshly ground black pepper
1/2 lb, carrots, cut diagonally in 1-inch pieces
1 yellow onion, sliced
1 tsp. chopped garlic
1/4 c. Cognac or good brandy
1/2 bottle (375 ml) good dry red wine such as Burgundy
1 c. good chicken stock, preferably homemade
10 fresh thyme sprigs
2 Tbs. unsalted butter, at room temperature, divided
1 1/2 Tbs. all-purpose flour
1/2 lb. frozen small whole onions
1/2 lb. cremini mushrooms, stems removed and thickly sliced
Preheat the oven to 250 degrees F.

coq-browningHeat the olive oil in a large Dutch oven. Add the bacon and cook over medium heat for 8 to 10 minutes, until lightly browned. Remove the bacon to a plate with a slotted spoon.

Meanwhile, lay the chicken out on paper towels and pat dry. Liberally sprinkle the chicken on both sides with salt and pepper. When the bacon is removed, brown the chicken pieces in batches in a single layer for about 5 minutes, turning to brown evenly. Remove the chicken to the plate with the bacon and continue to brown until all the chicken is done. Set aside.

Add the carrots, onions, 2 teaspoons salt, and 1 teaspoon pepper to the pan and cook over medium heat for 10 to 12 minutes, stirring occasionally, until the onions are lightly browned. Add the garlic and cook for 1 more minute. Add the Cognac and put the bacon, chicken, and any juices that collected on the plate into the pot. Add the wine, chicken stock, and thyme and bring to a simmer. Cover the pot with a tight fitting lid and place in the oven for 30 to 40 minutes, until the chicken is just not pink. Remove from the oven and place on top of the stove.

coq-cookingMash 1 tablespoon of butter and the flour together and stir into the stew. Add the frozen onions. In a medium saute pan, add the remaining 1 tablespoon of butter and cook the mushrooms over medium-low heat for 5 to 10 minutes, until browned. Add to the stew. Bring the stew to a simmer and cook for another 10 minutes. Season to taste. Serve hot.

Chive Risotto Cakes

risotto-cake-closeup When I started this blog oh so many, um…days ago, I asked myself a very important question: as I work my way through all of these millions of recipes that I have in piles, cookbooks, and Firefox bookmarks, will I post all of my results, or just the best ones?  Will people want to read about a failed attempt at a standing rib roast, or is that pointless?  Am I making recipe recommendations or offering people a chance to learn from my kitchen forays?
I said that I asked myself that question, but I never said I answered it.  Until today, it really has not been an issue!  Not that I am some culinary prodigy in the kitchen or anything, but in my first month of blogging, I haven’t yet had a disaster, and so I have been content to post about nearly all my recent recipe trials.

This is not to say that the chive risotto cakes were a disaster for me.  In fact, I think I would be more excited about the post if they had been.  I could have featured my Italian version of a “Cake Wreck” (get it? 😉 )!  No, they did not fail completely – more like a B minus.  However, those with whom I went to college know that such a grade could send me reeling for days…

I suppose I should preface the whole discussion with the fact that RJ and I love risotto.  Not only does it fit into the warm-and-hearty comfort food category while still being an excellent option for entertaining, but risotto has a special place in my heart because it is one of the only dishes into which I can insert vegetables without RJ flipping out.  His recent acceptance of onions, mushrooms, and butternut squash all resulted from one of my risotto variations.  Generally, I will cook risotto on a night when I have time to stand around the stove for an hour or so, and we will have leftovers for Day 2.  If you’ve never tried to reheat risotto in a microwave before, please trust me: it isn’t very pretty.  It comes out gummy and sticky and nowhere near as good as fresh risotto.  But the stickiness may be used to great advantage, also.  Cold leftover risotto of any flavor can be molded into round balls, rolled in panko crumbs, slightly flattened into a hamburger shape, then pan fried in butter or oil.  You will end up with a crispy browned crust and an oozy, like-Day-1 risotto center.

Reading Deb’s pick for the Barefoot Bloggers‘ Bonus recipe, I was actually thrilled.  Ina’s description explicitly claimed that her recipe provides risotto cakes without the Day-1 effort of stirring and gradually adding stock ladle by ladle.  “Brilliant!”, I exclaimed.

risotto-cake-miseI gathered my ingredients and even went to my favorite cheese shop for fine imported Fontina.  Though the chives were a bit yellowed in some places, I figured I would only use the best ones and we’d be fine.  But all the Fontina val d’Aosta and fresh-from-the-ground chives in the world could not save these risotto cakes.  I am interested to see if the others felt the same as I did, or if I have just been spoiled by having ‘real’ risotto cakes as part of my repertoire for a while now, but I thought these suffered severely from the outset due to one major flaw in the directions – you cannot cook risotto in water!  My cakes tasted, well, watery – comparable to how the inside of a baked potato with chives might taste if you omitted salt, butter, and sour cream.

To defend Ina’s honor, I probably could have salted the water more, or incorporated even more cheese or dried the rice in paper towels as opposed to a sieve.  But none of that could have compensated for the flavor that chicken broth gives to risotto. That just wasn’t there.  Even with all the cheese the recipe called for, the rice was barely holding together in balls because of the way the rice had been waterlogged.  My clear conviction is that there is no shortcut to risotto, and thus no shortcut to the crispy cakes.  Go the traditional route and make your favorite risotto dish.  Then, on Day 2, treat yourself to your own homemade creation, covered in panko and fried.

Well, this is the moment of truth.  Do I post the recipe?  Will posting it diminish my integrity as a blogger or detract from my validity as messenger of good taste?  I think not.  You’ve read my opinion of the recipe above, but of course you all have the ability to make up your own minds.  Perhaps reading the recipe will give us all some insight into where it goes wrong.  Conversely, you may set out to prove that Ina is right and I am not, and I invite you to share your results with me in the comments section.  Just don’t ever say I didn’t give you fair warning.

Chive Risotto Cakes, from Barefoot Contessa: Back to Basicsrisotto-cake-mix

Kosher salt
1 cup uncooked Arborio rice
½ cup Greek yogurt
2 extra-large eggs
3 tablespoons minced fresh chives
1 ½ cup cups grated Italian Fontina cheese (5 ounces)
½ teaspoon freshly ground black pepper
¾ cup panko (Japanese dried bread flakes)
Good olive oil

Bring a large (4 quart) pot of water to a boil and add ½ tablespoon salt and the Arborio rice. Cook, stirring occasionally, for 20 minutes. The grains of rice will be quite soft. Drain the rice in a sieve and run under cold water until cool. Drain well.
risotto-cake-raw
Meanwhile, whisk together the yogurt, eggs, chives, Fontina, 1 ¼ teaspoons salt, and the pepper in a medium bowl. Add the cooled rice and mix well. Cover with plastic wrap and refrigerate for 2 hours or overnight, until firm.

When ready to cook, preheat the oven to 250 degrees.

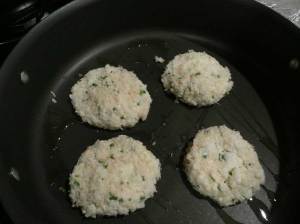
Spread the panko in a shallow dish. Heat 3 tablespoons olive oil in a large skillet over medium-low heat. Form balls of the rice mixture using a standard (2 1/4 –inch) ice cream scoop or a large spoon. Pat the balls into patties 3 inches in diameter and ¾ inch thick. Place 4-6 patties in the panko, turning once to coat. Place the patties in the hot oil and cook, turning once, for about 3 minutes on each side until the risotto cakes are crisp and nicely browned. Place on a sheet pan lined with parchment paper and keep warm in the oven for up to 30 minutes. Continue cooking in batches, adding oil as necessary, until all the cakes are fried. Serve hot.