Elephant Walk Cooking Class

All cooks find themselves in a rut from time to time. In those periods, the same dishes keep appearing on the dinner table week after week – in my case, momofuku noodles (post coming soon), pasta with meat sauce, and sauteed chicken breasts with rice. One solution to this would be to open up one of my million cookbooks and find myself a recipe, clearly.  A slightly more expensive — and certainly more entertaining — fix is to find a cooking class!  Even better, find a cooking class for a cuisine with which you are unfamiliar.  This will ensure both education and several new avenues for experimentation to keep you out of that rut for a long while!

Last weekend, my mother and I attended a cooking class at a local Cambodian restaurant, The Elephant Walk.  Their courses (and food!) were recommended to us by a close friend, and how right he was.  We had a fantastic time visiting a Cambodian market and then returning to the Elephant Walk kitchen to cook up a three-course lunch, which we promptly devoured with delicious wine to accompany.

We chose the class called “Doing It All on Market Day”.  This cost a little more, but was worth every penny.  We arrived at 8:30 at the restaurant and traveled from there to Revere, one of the three largest Cambodian communities in the United States (the other two are Lowell, MA and Long Beach, CA).  A little store market there carried produce and non-perishables from Cambodia, Thailand, Vietnam, China, and Latin America.  As Longteine de
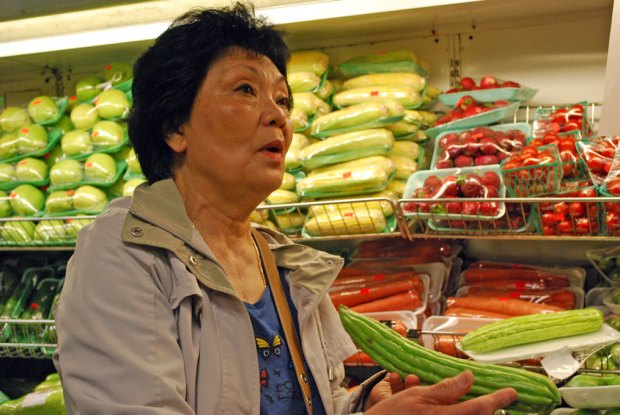
Monteiro, Elephant Walk’s head chef, explained, as property values in neighborhoods near Boston have risen, Hispanics have moved in to places the Cambodians can no longer afford.  Thus, the market showcased Thai basil next to cilantro, tamarind alongside tomatillos, and lemongrass sidled up to habaneros.  I wish I had taken more pictures of the various exotic vegetables, like banana blossoms, khmer eggplant, and string beans that measured two feet long!  Here is Longteine showing us a fuzzy melon (which is like a spongy squash):

Notice the cactus in the bottom right!  Another “melon” to which we were introduced was called bitter melon – although this one was more like a cucumber:

With each new vegetable, she explained to us how they would be used.  Most to all of them can go into sour soup, if you’re wondering.  If you want more than my memory can provide, fear not! There’s The Elephant Walk Cookbook too.

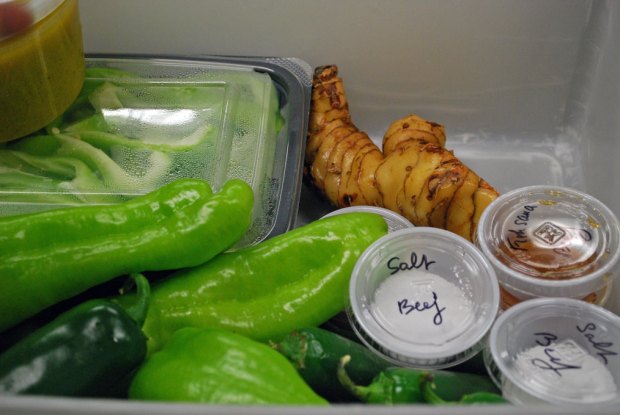
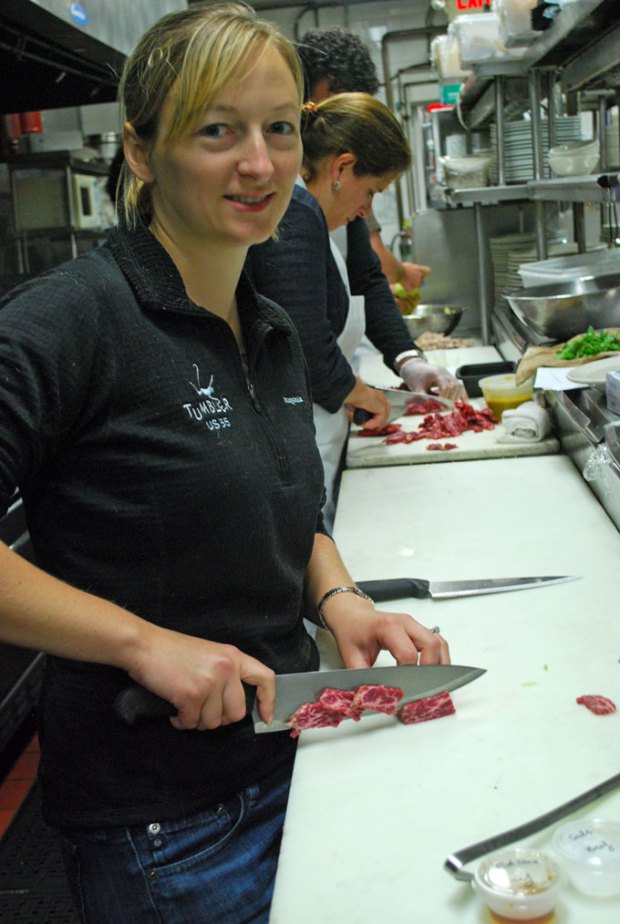
Once we collected everything we’d need for our class (plus Mom and I picked up bean sprouts, mushroom soy sauce, and tamarind paste to make some Pad Thai later), we headed back to the restaurant.  The 10 or so participants picked partners, and each pair was assigned a course.  Mom and I chose the Spicy Beef with Peppers and camped out at a station in the kitchen. Everything was very clean and organized, and our mise had already been put en place:

Much of the above you’ll recognize: salt, sugar, fish sauce, jalapenos and cubanelle peppers.  The odd ginger-like thing at the top is called galangal or a rhizome.  It is similar in look, texture and use-value to ginger, but tastes more peppery than gingery.  At the top left, you can see the base of a container full of the most incredible ambrosia… lemongrass paste, they call it.  To make it, blend the following ingredients together for 2-3 minutes until smooth:

2 Tblsp. thinly sliced lemongrass
2 large garlic cloves, coarsely chopped
1 medium shallot, coarsely chopped
2 teaspoons peeled, coarsely chopped galangal
1/2 tsp. tumeric
1/2 cup water

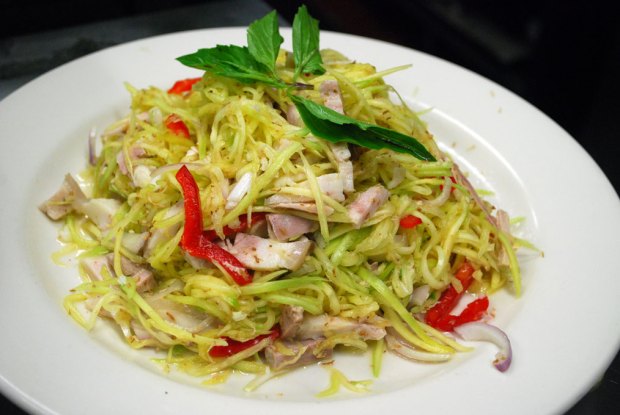
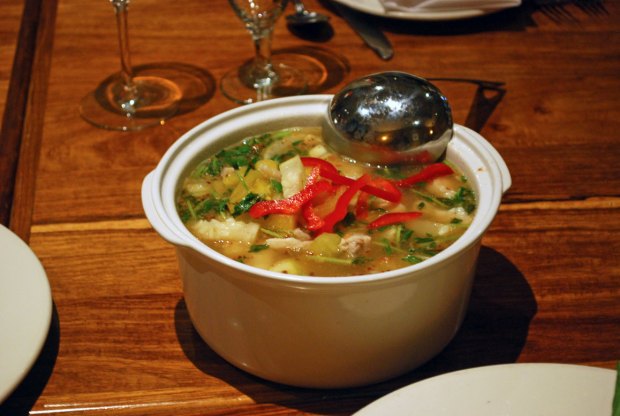
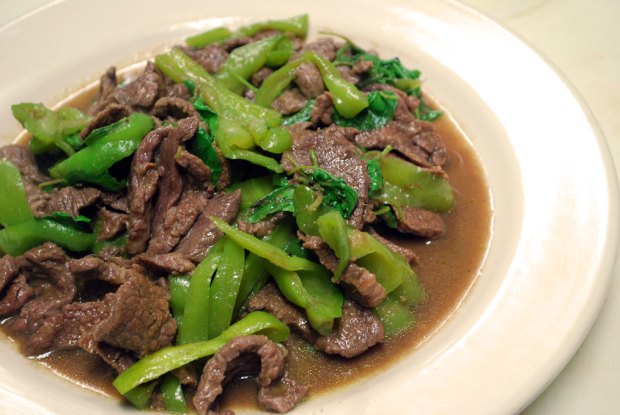
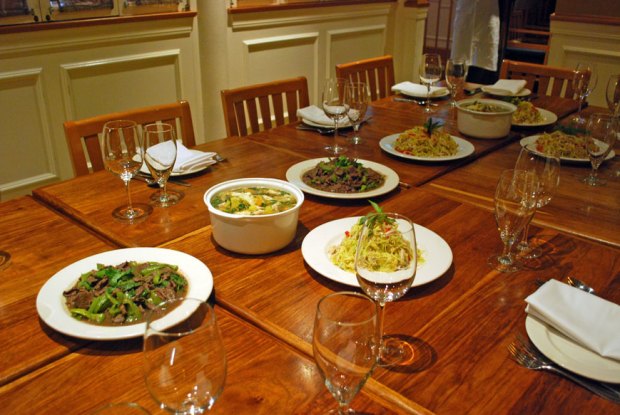
We spent about 35 minutes cooking, and then shared our dishes – green mango salad, sour soup with tilapia, and spicy stir-fried beef at a long table set for an elegant party.  I highly recommend the experience — very good food and definitely a departure from my norm.  The restaurant also offers courses in French-Asian fusion, Vegan & Vegetarian Cooking, and Pan Sauces, just to name a few.  The instruction wasn’t very comprehensive in terms of technique, especially given that in some cases the lemongrass paste was already made and the peppers already chopped, but we had a pretty well-trained group.  For me, the class was more about thinking through new flavor combinations and using ingredients I’ve never seen before.  Consider that rut a thing of the past!

I also enjoyed seeing the class through the lens of a world history teacher.  Since my last post, I have finished a master’s program at Harvard Graduate School of Education, and have spent two years teaching and living at a boarding school.  No wonder I don’t have time for blogging!  But throughout my cooking class last Saturday, I couldn’t stop thinking about how none of our dishes would have been possible without the Columbian Exchange, the term used to describe the integration of crops and people from the Americas and the rest of the world.  For most of recorded history, these two hemispheres were separated by unnavigable waters.  They thus developed quite different species of flora and fauna.  In the Americas, people grew potatoes, peppers, corn, tomatoes, and pineapple – none of which had been seen before 1492 by farmers in Europe, Africa, or Asia.  Men from those continents brought wheat, rice, onions, most spices, and sugar — not to mention cows, pigs, chickens, and sheep — across the Atlantic to revolutionize agriculture in the Americas.  See how many Old World/New World interactions you can find in the below recipes!

Nyuom Svay (Green Mango Salad), serves 4
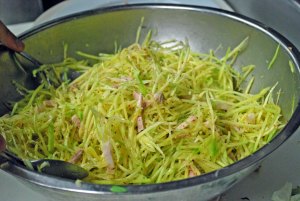
4 medium green mangoes, finely julienned
1 large shallot, very thinly sliced
8 oz. cooked pork belly or pork butt, very thinly julienned
1/2 cup fresh grated coconut, roasted
1/2 cup julienned red bell pepper
1 Tblsp. salt
1 Tblsp. fish sauce
3 Tblsp. sugar
1 to 2 Tblsp. fresh lime juice to taste

In a large bowl, toss all the ingredients together. Garnish with fresh mint or basil.  [The recipe book we were given suggests you need 1 cup loosely packed mint, and the same amount of Thai basil.  But if you see the photos, I don’t see anywhere near that much shown.  I think that the flecks of brown are the toasted grated coconut.]

Samalh Machou Trey (Sour Soup with Tilapia and Pineapple), serves 4
4 cups chicken broth
3 tilapia filets, cut into 2 1/2 inch pieces
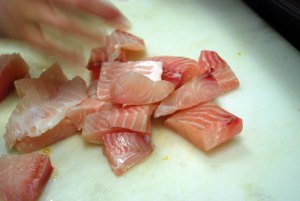
2 cloves garlic, smashed
1 1/2 Tblsp. sugar
1/2 tsp. salt
2 Tblsp. fish sauce
2 Tblsp. fresh lime juice
8 oz. pinapple, julienned 1/2 inch thick
8 oz. fuzzy squash (see photo above), peeled and cut into the same size as pineapple
2 plum tomatoes, quartered (we used green tomatoes)
3 Tblsp. fried chopped garlic
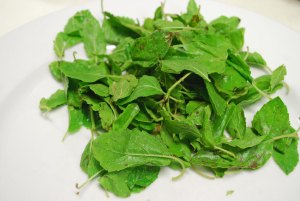
1 cup sliced Maam, aka “French mint” or “Asian cilantro” (see image at right)

Put the chicken broth in a medium stockpot and bring to a boil.  Add the garlic, pineapple, squash, tomatoes, salt, sugar, and fish sauce.  Return to a boil, reduce the heat to medium, and simmer for 5 minutes until the vegetables are soft.

Gently stir in the lime juice and the fish and cook for another 8 minutes.

Add the fried garlic and maam.  Serve immediately with cooked jasmine rice in the individual bowls.

Saiko Cha K’dao (Spicy Stir-fried Beef), serves 4
3/4 lb. cubanelle peppers (about 3 large)
1/4 lb. jalapeno peppers (about 5)
1/4 c. vegetable oil
1 recipe lemongrass paste (see above)

1 lb. boneless sirloin, cut into strips 2 inches long, 1 1/2 inches wide, and 1/4 inch thick. [she told us we had short rib meat.  Not sure if that is the case]
1 1/2 Tblsp. sugar
1 Tblsp. fish sauce
1 tsp. salt
2 cups loosely packed fresh mareh preuw (aka holy basil) or regular basil leaves (see photo)
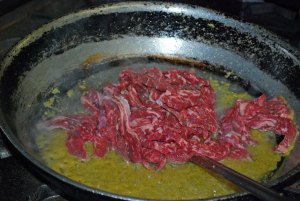
Slice the peppers very thinly lengthwise, removing seeds and veins.  Then cut into 2 inch lengths.  Heat the oil in a large skillet or wok over medium-high heat. Add the lemongrass paste and cook until its aroma is released, about 1 minute.
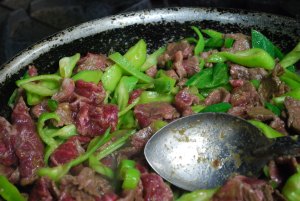
Stirring well as you go, add the beef, peppers, sugar, fish sauce and salt, and simmer for 3-4 minutes, until the meat is cooked through.  Remove from the heat and add the herbs.  Serve with rice.


Thank you, Nyep, for the great class.  Thank you, Mom, for inviting me to the great class.  Thank you, Eric, for the gift certificates that allowed us to take the great class!
Back with a Vengeance: Momofuku-style

Hellloooooo, everyone.  I can barely contain myself, I am so happy to be back.  After a year of having my nose in a book, I can finally pull it out and put it to a better purpose: smelling the delicious aromas of caramelized meats, yeasty doughs, and rosy wines.  For my comeback tour, I am resuming the cookbook challenge, and am starting with a fabulous one: The Momofuku Cookbook.

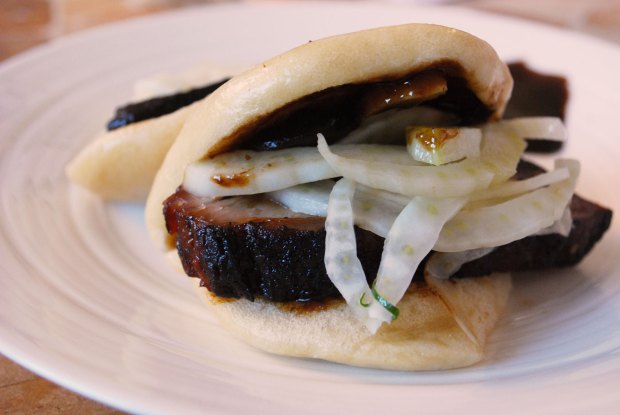
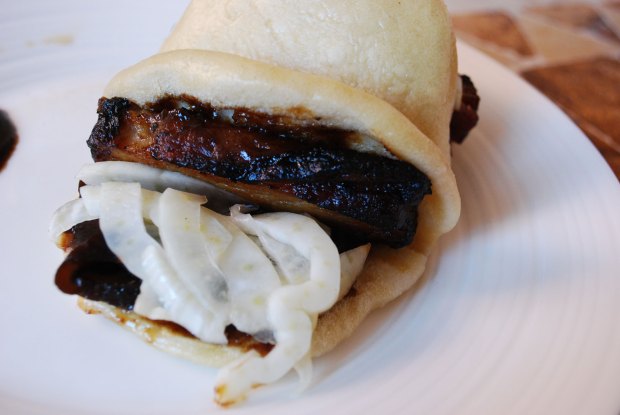
As many of you may have heard, David Chang is the lauded proprietor and chef behind the Momofuku empire of the East Village.  A trip to visit my brother in New York last year included a dinner at Momofuku Ssam, followed by a return to the attached “Milk Bar” for this cake.  The dinner, though, was the highlight.  Ssam is known for several specialities, but none more famous than the pork buns.  From the first bite, we were soulmates.  Wrapped in an airy, tender bun is a slab of slow-roasted pork belly, slathered in salty-sweet hoisin sauce and punctuated with lightly-pickled cucumber slices.  I truly could have eaten 15.  RJ, too, was enamored.  I think his comment was, “you better take notes.”  Unfortunately, I had no clue where to start with making the white, spongy, slightly sticky buns.  I had never attempted anything like them.  But when the Momofuku cookbook came out, I no longer had any excuse.  I rolled up my sleeves and started kneading.

The results?  Incredible.  The buns tasted just as good as those from the restaurant.  Yes, the recipe is labor-intensive.  And, if you’re going for the full experience, you’re going to want to make up some of Ssam’s awesome condiments too.  I pickled some fennel and shiitake mushrooms.  Damn, they make for a good bun.

Momofuku’s Famous Pork Buns

FOR PORK
1/4 cup kosher salt
1/4 cup sugar
3 lb skinless boneless pork belly

FOR BUNS
1 1/2 c. warm water at room temp
1 Tbs. plus 1 tsp. active dry yeast
4 1/2 c. bread flour
6 tablespoons sugar
3 tablespoons nonfat dried milk
1 Tbs. kosher salt
Rounded 1/2 tsp. baking powder
1/2 tsp. baking soda
1/3 c. rendered pork fat or vegetable shortening at room temp.

For the Pork:
Stir together kosher salt and sugar, and rub all over the pork. Discard excess. Nestle in a shallow dish that fits the meat snugly and cover with plastic wrap. Let brine, chilled, at least 6 hours but no longer than 24.

Heat oven to 450 F. Discard any liquid that accumulated. Put the belly in the oven, fat side up, and cook for 1 hour, basting it with the rendered fat at the halfway point, until it’s an appetizing golden brown. Then turn oven temp down to 250F and cook for another hour until belly is tender (not falling apart but it should feel like a down pillow when firmly poked).
OR: Pour in 1/2 cup broth and 1/2 cup water. Cover tightly with foil and roast until pork is very tender, about 2 1/2 hours at 300 F. Remove foil and increase oven temperature to 450°F, then roast until fat is golden, about 20 minutes more.

Remove pan from oven and transfer belly to a plate. Decant fat and meat juices from the pan and reserve (fat can be used for cooking later, and juices can be used to flavor a sauce). Cool 30 minutes, then chill, wrapped in plastic or aluminum foil, until cold and firm, at least 1 hour.

For the Buns:
Stir together warm water with yeast in the bowl of a stand mixer outfitted with the dough hook. Add the flour, sugar, milk powder, salt, baking powder, baking soda, and fat and mix on the lowest speed possible for 8-10 min. The dough should gather together into a neat, not-too-tacky ball on the hook. When it does, lightly oil a medium mixing bowl, put the dough in it, and cover the bowl with a dry kitchen towel. Put it in a warmish place and let rise until the dough doubles in bulk, about 1 hour and 15 min.

Punch down dough, then transfer to a very lightly floured surface and flatten slightly into a disk. Divide the dough in half, then divide each half into 5 equal pieces. Gently roll the pieces into logs, then cut each log into 5 pieces, making 50 pieces total. They should each be the size of a Ping-Pong ball and weigh about 25 grams or just under an ounce. Roll each piece into a ball. Cover the 50 dough balls with a draping of plastic wrap and allow them to rest and rise for 30 min.

Meanwhile, cut out fifty 4x4inch squares of parchment paper. Coat a chopstick with whatever fat you’re using.

Flatten out 1 piece of dough into a 6- by 3-inch oval, lightly dusting surface, your hands, and rolling pin with flour. Pat oval between your palms to remove excess flour, then fold in half crosswise over the greased chopstick (do not pinch). Withdraw the chopstick, leaving the bun folded, and put the bun on a square of parchment paper. Stick it back under the plastic wrap (or a dry kitchen towel) and form the rest of the buns. Make more buns with remaining dough, then let stand, loosely covered, until slightly risen, about 30-45 minutes.

Set a large steamer rack inside skillet (or wok) and add enough water to reach within 1/2 inch of bottom of rack, then bring to a boil. Carefully place 5 to 7 buns (still on parchment paper) in steamer rack (do not let buns touch). Cover tightly and steam over high heat until buns are puffed and cooked through, about 10 minutes. Transfer buns to a plate with tongs, then discard wax paper and wrap buns in kitchen towels (not terry cloth) to keep warm. Steam remaining buns in batches, adding boiling-hot water to skillet as needed. Use buns immediately (reheat in steamer for a minute or so if necessary) or allow to cool completely, then seal in plastic freezer bags and freeze for up to a few months. Reheat frozen buns in a stovetop steamer for 2-3 minutes, until puffy, soft, and warmed all the way through.

Return buns (still wrapped in towels) to steamer rack in skillet and keep warm (off heat), covered.

TO SERVE:
Slice pork thickly against the grain. Reheat in 350 degree oven or in skillet until warmed all the way through and tender/jiggly (about 20 min in oven or 5 min in skillet). If you have any pork juices, warm them in the same container.

Brush bottom half of each warmed bun with hoisin sauce, then sandwich with 1 or 2 pork slices and some accoutrements: fresh scallions, sriracha, or the below:

Pickled Fennel
Cut a fennel bulb or two in half from root to stalk. Cut out the core, and cut the halves in half (along the same axis as before). Slice the fennel into thin strips, less than 1/8 in thick. Combine 1 cup of piping hot tap water, 1/2 cup rice wine vinegar, 6 Tbs. sugar, and 2 1/4 tsp. kosher salt, stir to dissolve sugar. Place the fennel in a quart size container, and pour the liquid mixture over the fennel. Cover and refrigerate. Tastes best after a couple of days, but can be used immediately.

Soy Sauce Pickled Shiitakes
Steep 4 loosely packed cups of dried shiitake mushrooms (about 1/3 oz) in boiling water until softened, about 15 min. Lift the shiitakes from the steeping water, trip off and discard any stems, and cut caps int 1/8 in. thick slices. Reserve 2 cups of the steeping liquid and pass it through a fine-mesh strainer to remove grit and debris.
Combine the reserved steeping liquid, 1 c. sugar, 1 c. light soy sauce, 1 c. sherry vinegar, two 3-inch knobs of peeled fresh ginger and sliced shiitakes in a saucepan. Turn the heat to medium, bring to a very gentle simmer and stir occasionally for 30 min. Let cool.
Discard the ginger and pack the shiitakes (and as much of the liquid as necessary to cover them) into a quart container. These pickles are ready to eat immediately and will keep, refrigerated, for at least 1 month.

Ramen Noodle Salad

ramen-saladLeftovers Week continues… After my fancy doctored-up ramen dinner for one, I had a half-package of ramen noodles with the seasoning pack, half a head of napa cabbage, and plenty of scallions, all of which had to go before The Big Move. Fate itself can be credited with my discovery of this recipe, for in the midst of packing I happened upon a small recipe binder.

This binder was a gift from my wedding shower which was cooking-themed (go figure!). Each guest brought a dish with them to the party, along with the recipe for the dish and a gift that related to the recipe. For example, one guest made sangria and my gift was the beautiful glass pitcher she served it in. Another friend made blueberry crumb cake and gave me a beautiful pottery berry bowl.

The shower hostess (my lovely cousin Audrey who herself is now engaged and deserving of reciprocity) collected everyone’s recipe cards and put them into a binder for me to have. While I have turned to the binder several times (whenever a strong food craving reminds me of something delicious I ate at the shower), I must somehow have missed the recipe for Chinese Salad sent in from my aunt who was unable to come last June. If she had attended, I am sure I would not have been able to forget this fun and flavorful dish!

As I flipped through the binder before putting it into a cardboard moving box with the other cookbooks, I happened to fall upon Aunt Robbie’s recipe card — serendipity. Three more items saved from the rubbish bin, and in such a delicious way. I must admit I balked at the quantities on the card, but I wasn’t serving a crowd (as the card promises), so I cannot say that the amounts listed below are incorrect. All I can say is that in addition to quartering the recipe I also probably reduced the proportion of butter and sugar listed here. Nevertheless, I will report the recipe as it was given to me – to do otherwise would be to reject the wisdom passed to the new bride and I don’t need any of that bad juju.

Chinese Salad
1 stick butter
2 packages chicken-flavored Ramen noodles, broken into tiny pieces (with 1 package of the enclosed seasoning)
1 cup slivered almonds
2 Tbs. sesame seeds
1 bunch bok choy
1 bunch scallions
1 head Napa Cabbage

 Dressing
1/4 cup cider vinegar
1/2 cup sugar
2 Tbs. soy sauce
3/4 cup olive oil

Melt the butter in a large saute pan over medium-high heat.  Add the noodle pieces, the 1 package of ramen seasoning, the almonds and the sesame seeds – saute until almonds and/or noodles just begin to brown.

ramen-saute

Slice the vegetables into thin slices or julienned strips and toss in a salad bowl with the noodle saute.

Whisk together the cider vinegar, sugar, and soy sauce, then mix in the olive oil slowly while whisking. Toss the salad with the dressing.

In the manner of all lovely handed-down recipes on index cards, there is a note: “Serves a crowd and is always a hit!”

Doctored-up Ramen

Ramen Noodles

A cookbook author and an editor/correspondent for Gourmet, Nina Simonds has shared her philosophy about Asian cooking and ingredients widely.  One of her methods for spreading the word is through her “Dinner Doctor” character, who goes around solving common challenges to making delicious, healthy dinners.  She can be seen on Oprah and her own website breaking down people’s extensive excuses – I am too tired at the end of the day, I don’t know how, it’s too expensive to buy groceries, I have to eat takeout to get to my fortune cookie, etc…

My second foray into Nina’s book, Spices of Life, is a healthful twist on doctored-up ramen.  Ramen noodles, the staple of college dorm rooms everywhere, answer almost all of the above excuses (you’ll still have to get your own fortune cookie – sorry – but Confucious says necessity is the mother of invention).  Ramen are super easy and low effort (add water and stir) and cost about 20 cents a package.  Granted, this dinner-doctored version is a bit more high maintenance, but it is also far FAR better tasting.  Toss out your “flavor pak” and check this recipe out:

Stir-Fried Ramen Noodles with Vegetables, from Nina Simonds’ Spices of Life

(serves 6)

ramen-mise3/4 lb. fine dried Japanese ramen, Chinese egg noodles or angel hair pasta
1/2 small head Chinese (Napa) cabbage (about 3/4 pound)
2 Tbs. virgin olive oil
2 Tbs. minced fresh ginger
1 tsp. dried chile flakes, or to taste
2 medium red onions, peeled and cut into thin slices (about 2 1/2 cups)
2 carrots, peeled, ends trimmed and grated
2 Tbs. rice wine or sake

Noodle Sauce (mixed together):
5 Tbs. soy sauce
2 Tbs. mirin (or 2 Tbs. rice wine or sake plus 1 1/2 Tbs. sugar)
1 1/2 Tbs. Worcestershire sauce
3 Tbs. soy sauce

2 Tbs. toasted sesame seeds

Bring 3 quarts of water to a boil in a large pot. Drop the noodles into the water and stir to prevent them from sticking together. Bring the water again to a boil and cook 4 1/2 to 5 minutes, or until the noodles are just cooked. (Since the cooking time varies with the type of noodles, refer to the package for the recommended time.) Drain the noodles in a colander and rinse under warm running water. Drain again and set aside.

ramen-onions

Cut the cabbage leaves from the stem. Trim the leafy tip ends and discard. Rinse the leaves thoroughly and drain. Cut them into julienne strips about 1/4 inch wide, separating the stem sections from the leafy sections.

ramen-cabbage

Heat a wok or a heavy skillet, pour in the oil, and heat over medium-high heat until hot. Add the ginger, garlic, chile flakes, and onions, and stir-fry for about a minute. Cover and cook for several minutes, until the onions are soft. Add the cabbage stem shreds, carrots, and rice wine. Stir-fry lightly, cover, and cook for about 1 1/2 minutes, until almost tender. Add the leafy cabbage shreds, toss, cover, and cook for a minute or two. Pour in the Noodle Sauce, bring to a boil, and add the noodles and the sesame seeds. Toss lightly to coat the noodles and vegetables and spoon onto a serving platter. Serve immediately.

Fancy Ramen Noodles

(As you can see from the pictures, I sauteed some shrimp to mix in, but as-is it is a vegetarian main course.)